top of page
Writer's pictureLee'Or Meyerson


Welcome back to week 6 of the One Room Challenge series. If you missed week 5 of the Home Office design, you can find it here.

A quick recap from last week: we began to prep and prime the cabinets and my client chose Sherwin WIlliams Dark Night for her paint color.


I cannot tell you how happy and grateful I am that we are finally laying color on these cabinets. Even though this has been a relatively quick project with lots of visible progress, when the paint leaves the can, we know that we are about to cross the finish line!

We defintely hit a few bumps in the road with the painting. One of the biggest issues was the dust and paint particles that were flowing throughout the rest of the house, which is very light and pristine. This office only has two access points, the french doors that open into the house and the window with a beautiful garden beneath it. My client keeps her home in immaculate condition and we did such a great job containging the dust until this point. Even with the doors closed, she was cleaning blue-green dust all over her house. With her permission and thankfully a week of decent weather, we completely sealed off the doors and entered through the windows above the beautiful garden.


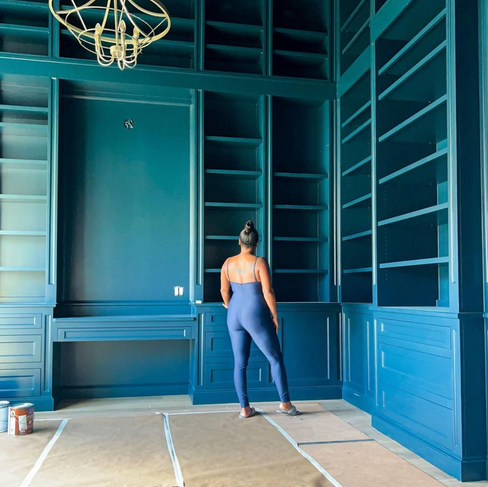
The other issue we ran into, and typically happens with dark paint no matter how well we prep, is that we ended up applying 3 coats and then do touch-ups. In addition to painting the cabinets, we were color drenching the room. If you do not know what color drenching is, it means that we also painted all the walls, the ceilings and the baseboards all the same color. At that point, my client did not know if she wanted to paint the doors as well, but I was able to convince her that it would all make perfect sense at the end.


All of these issues not only added a day or two onto the timeline, but also added additional costs for the crew and the paint. And if you have bought paint lately, then you know that can be costly. Thankfully, we only needed one more gallon.


The crew was able to complete painting and was also able to get the lighting and wallpaper hung. The vision is finally coming together and I think we can all agree that the finished product is ABSOLUTELY STUNNING! How cute is my client? You can see how massive the room actually is.


And we are at the end of week, shall I say 6 1/2 ish??!!

Next week, we will start adding the finishing touches and we are so close to the final reaveal!!


Just a reminder that this project is part of the Spring 2024 One Room Challenge (ORC) where bloggers, designers, and influencers makeover one room over the course of 8 weeks. Be sure to check out all of the other ORC week four updates on the ORC website. Catch up on my project with the week one office design plan.




59 views


Welcome back to week 5 of the One Room Challenge series. If you missed week 4 of the Home Office design, you can find it here.


Now that the bookcases are complete and installed, this week we are beginning what could be the most DREADED part of the project with most TRANSFORMATIVE change. And when I say dreaded, I do mean for all parties involved. At this point, I was so excited to begin the painting process because it means we are so close to the finish line. This is typically when my clients become antsy, especially when they are living in the home during the remodel. The dust from sanding and the clouds of fumes begin to overwhelm even the most patient person. It’s also at this point when it feels close to being finished and clients are ready to be done and want us out quickly!


Finalizing the Paint Color

Before I met with my client, I asked her to find pictures or any objects that would convey to me what she wanted to achieve with her design. She had a few pictures gathered and I knew she wanted to have a MOODY vibe in her office. The cabinets in the rest of her home are painted in Sherwin Williams Iron Ore and she was "ok" carrying that color in the office as well. I never like hearing my clients say they are "ok" with something and I knew we could do so much better than that.

When picking paint colors I always suggest using something that you own as a jumping off point. Whether you have a gorgeous piece of artwork or an exceptionally beautiful textile, use that statement piece as a place to start. Since we were starting from a blank slate, I started by sourcing the artwork for her office, which would be the main focal point. I also knew that I wanted to use a particular wallpaper behind the artwork. I used these two items as the anchors for selecting the paint color. After looking through my swatches, I settled on two colors, Sherwin Williams Dark Night (bottom left) and Behr Black Evergreen (bottom right).


While they are both beautiful colors, she was instantly drawn to Dark Night. It works so well with the artwork and pulls from the deepest color in the wallpaper. Dark Night can be described as a rich dark teal blue. At first look and in certain lights, Dark Night can read navy, but it's green undertones makes it feel richer and more vibrant. When choosing your paint color, I definitely recommend trying out samples in different parts of the room to see how the paint will read in your space and in different light.


Prepping the Room and the Cabinets


To say that getting this room ready for paint was difficult, would be quite the understatement. Sometimes, it can take longer to prep the room for paint, than to actually paint itself.

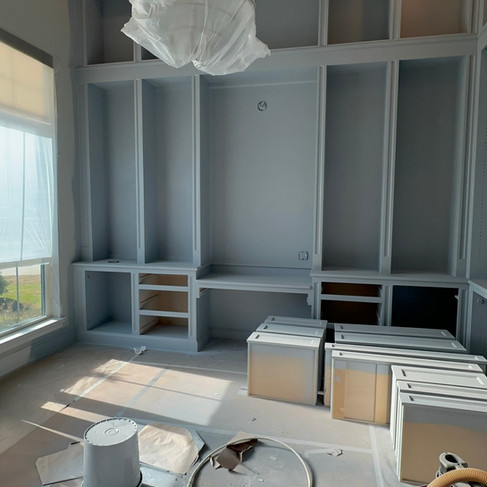
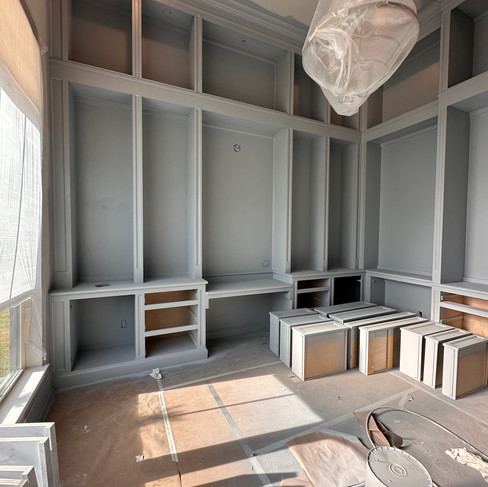
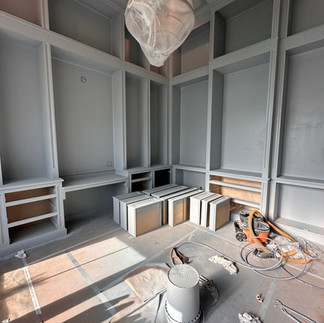
One of the most important tasks in prepping this room was covering those gorgeous floors. My carpenter had already put boards down to protect them from getting chipped in the installation process, so the painters added paper on top of that for added security. They also had to cover the chandelier and the window shade. In hindsight, we should have taken the shade down, not just covered it. (One tiny drip of paint that later landed on the plastic and seeped through has been a very costly lesson for me. I literally try to cover all the bases when preparing for every aspect of the job, but even after all of these years, "Paint Happens!")

Once everything was covered, the crew began the tedious job of filling in all of the nail holes and then sanding down every nook and cranny to be as smooth as possible. It's back breaking work and one of the main reasons I had to give up painting years ago. I have MAD RESPECT for my crew.

After a few days of prepping, they were finally able to start priming and you can already see what a difference even that made.


And just like that, that was the end of week 5! As I said last week...

Stay tuned for week 6 as we begin to tackle the massive job of painting these gorgeous built-ins.


Just a reminder that this project is part of the Spring 2024 One Room Challenge (ORC) where bloggers, designers, and influencers makeover one room over the course of 8 weeks. Be sure to check out all of the other ORC week four updates on the ORC website. Catch up on my project with the week one office design plan.


46 views


Welcome back to week 4 of the One Room Challenge series. If you missed week 3 of the Home Office design, you can find it here.


This week, we are finally beginning to install the 14' bookcases into my client's home office.


All of the components of the bookcases were built offsite in my carpenter's workshop and then delivered to the project site. It took two trips and two trailers to get everything to her home, which was quite the endeavor. With everything onsite, he was finally able to begin to assemble and put the finishing details into the office.


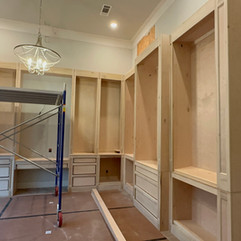
As you can see, these pieces are massive, and it was no easy feat to install them! We brought scaffolding in to reach all the way up to the ceiling. With only two guys on the crew, all of the precautions had to be taken.


Before we begin any installation, all of the electrical has to be carefully planned. To make the bookcases look even more custom and luxurious, they are finished with back panels. This means the wall plugs and switches had to be brought holes cut through the panels. The wiring for the library sconce had to be placed before all of the pieces were installed so that could come through hole in the paneling as well. This was all done onsite to ensure we are able to measure and re-measure for accuracy.


In every project I work on, there are always issues and this project was no different. From the bottom of the room to the top of the ceiling, the walls were out of alignment by almost 2 inches. Which means, that when you stack one piece on top of the other, by the time you get to the ceiling, the top component is pushing forward over the bottom components. You can see on the center desk unit, the upper cabinet is hanging slightly over the desk...

This is a perfect example of you are only as good as your team. My carpenter knew exactly what to do! By cutting out the drywall behind the bookcase, he was able to eliminate the fraction of space it was overhanging and attach it directly to the studs. Phew! Crisis averted.


Because of the crazy Texas weather and a couple of onsite hiccups, installation took a few days longer, but the results were absolutely worth the wait. Pictures really do not capture the majesty and grandeur of how this office is turning out.


Stay tuned for week 5 as we begin to tackle the massive job of painting these gorgeous built-ins.

Just a reminder that this project is part of the Spring 2024 One Room Challenge (ORC) where bloggers, designers, and influencers makeover one room over the course of 8 weeks. Be sure to check out all of the other ORC week four updates on the ORC website. Catch up on my project with the week one office design plan.


47 views
bottom of page